FRC: VS Code C++/Java
FRC C++/Java – Create a Project
Next we will create a new robot project in vscode and create a Talon SRX. The goal is compile the project only, so hardware is not needed.
Follow the WPI frc-docs instructions on reaching the create new project. Typically, you can use CNTRL+SHIFT+P to open the VS text bar, and type create to reach the WPI command.

“Timed Skeleton” is used in this example for sake of simplicity.
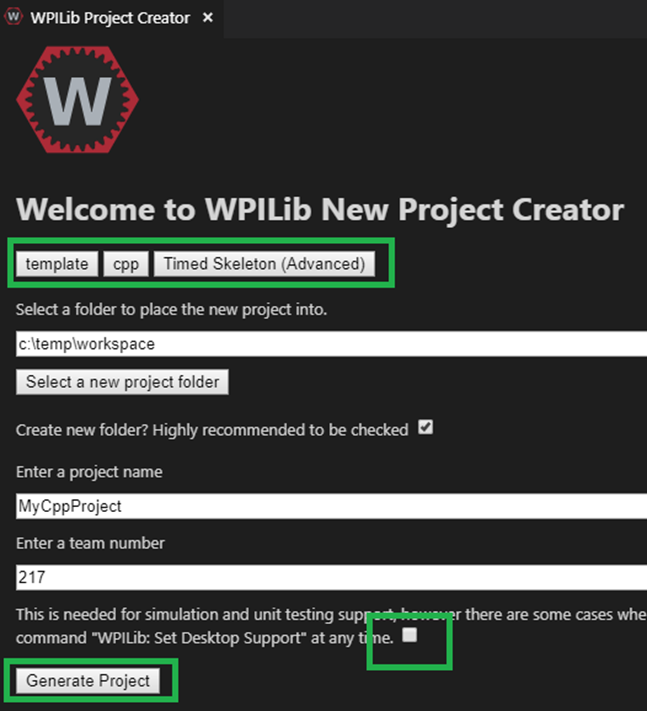

Once the project is created, ensure project builds. Testing robot deploy is also useful if robot controller is available.
FRC C++/Java – Add Phoenix
See the WPILib documentation on installing vendordeps.
Important
Phoenix 5 users must also install the Phoenix 6 vendordep.
FRC C++ Build Test: Single Talon
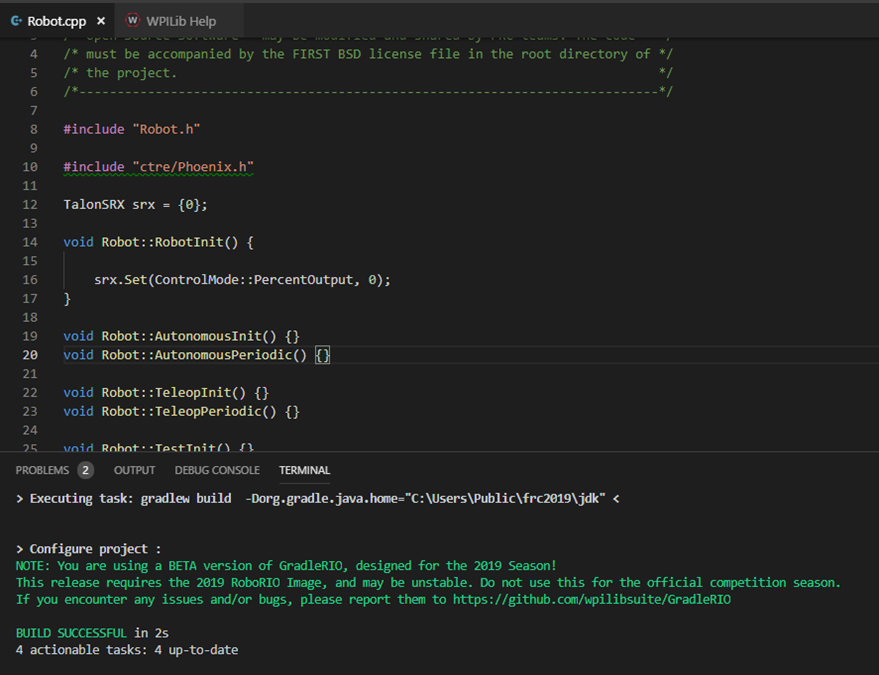
Create a TalonSRX object. The number specified is the Talon’s device ID, however for this test, the device ID is irrelevant.
Be sure to include “ctre/Phoenix.h”, otherwise TalonSRX will not be recognized as a valid class type.
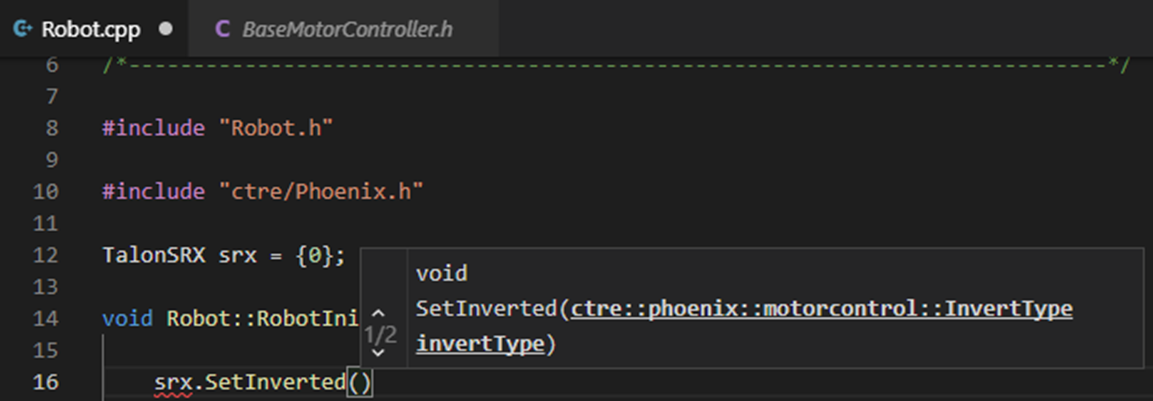
Add an example call, take your time to ensure to spell it correctly.
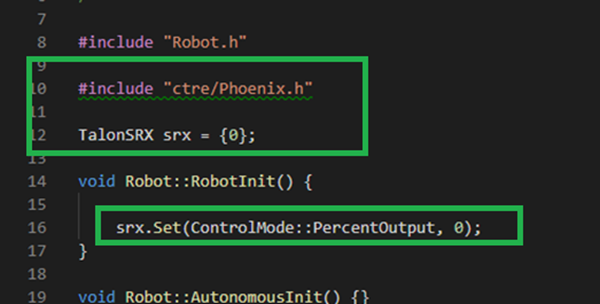
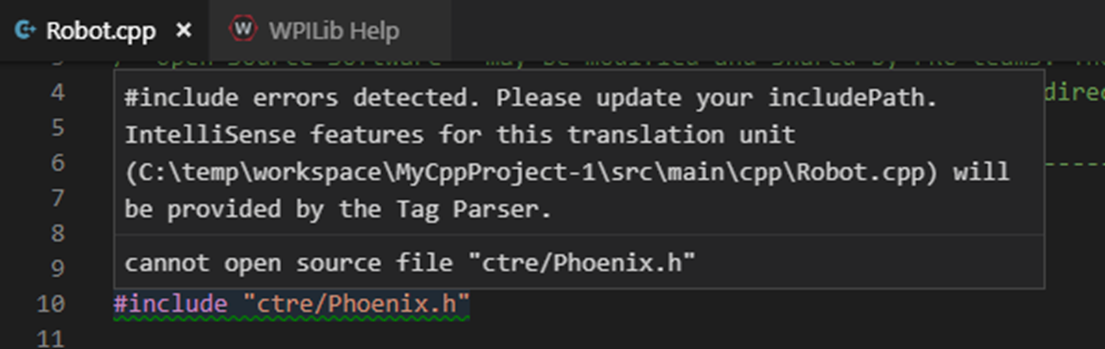
Intellisense may not be functional at this point in time (note the green underline indicating VS did not parse the header).

Tip
To correct this - Close all files in the project - Restart VS Code - Wait ~40s - Reopen source files in VS Code
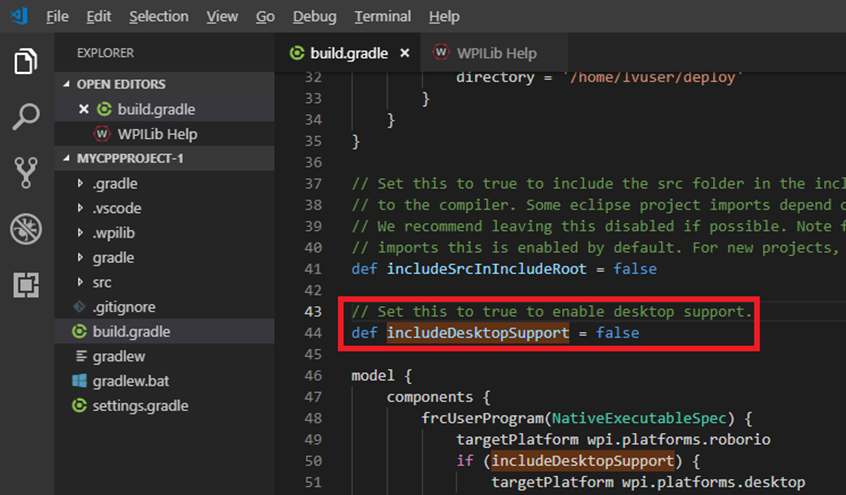
If you see linker errors, then the desktop simulation checkbox was likely checked.
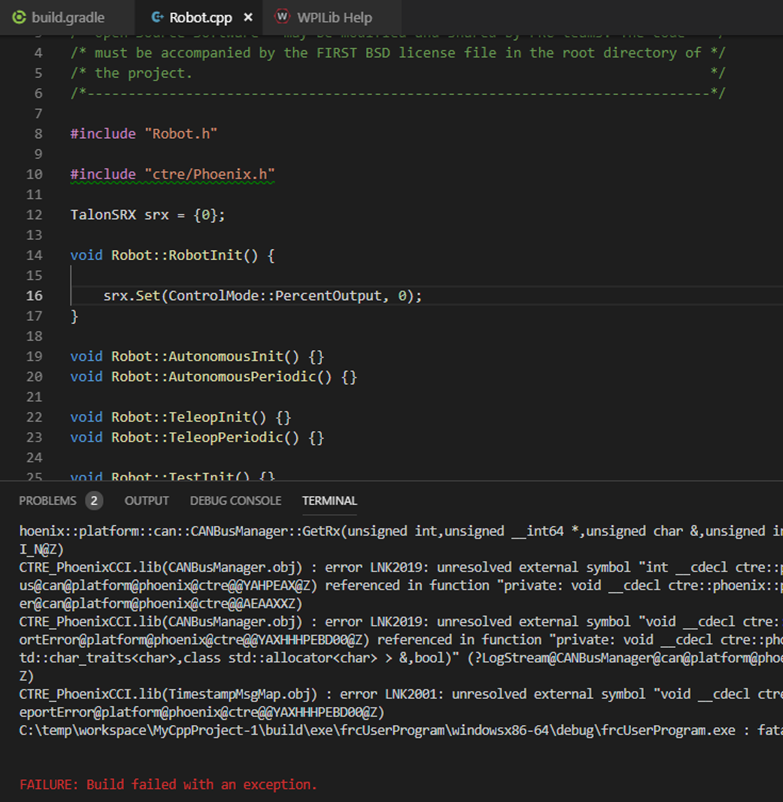
This can be resolved by manually turning off the feature. Set flag to false.
Tip
When resolving compiler/linker errors, press the trash icon first to cleanly erase the previous error lines in the terminal. Or manually scroll the bottom to ensure you are not looking at stale error lines from previously failed builds.

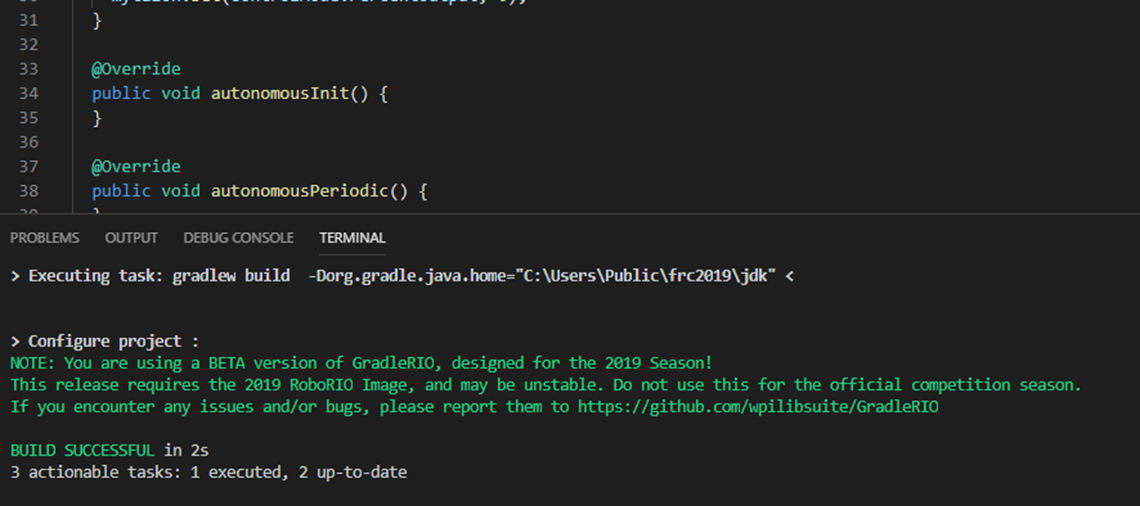
The only reliable way to confirm build was successful is to confirm the BUILD SUCCESSFUL line at the bottom of the TERMINAL.
Note
The problems tab may or may not be clear of errors. Our testing with VSCode has shown that it can report stale or incorrect information while making code changes. Always use the TERMINAL output to determine the health of your compilation and build system.
In the event that the intellisense is not resolving symbols (for IDE auto-complete features), restart VSCode.
After restart, routines should be found correctly.
Tip
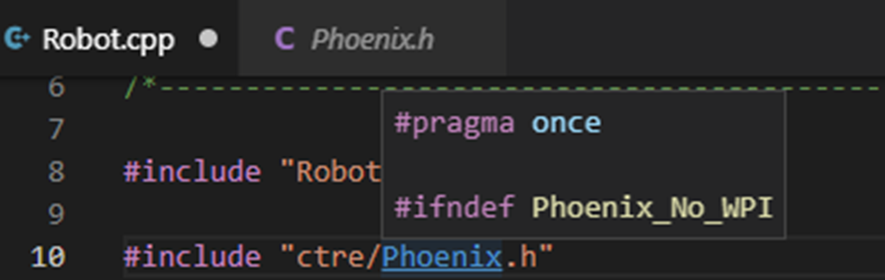
Headers can be auto-opened by CNTRL+CLICK the include line.
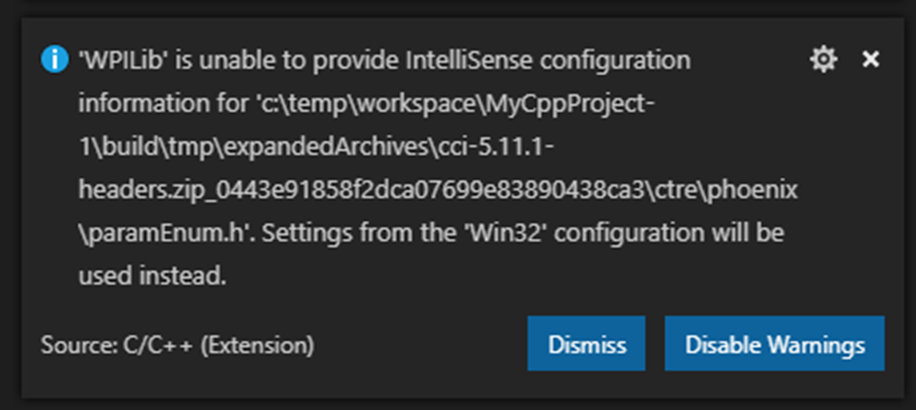
Depending on the version of VS Code used, you may encounter an IntelliSense warning. These can be ignored.
FRC Java Build Test: Single Talon
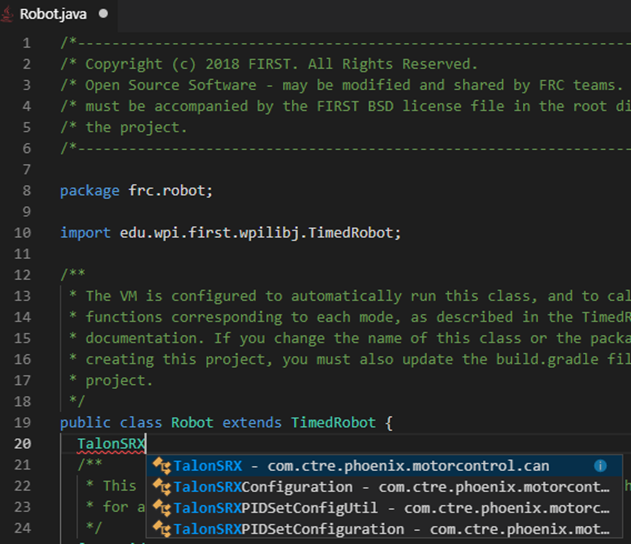
Create a TalonSRX object. The number specified is the Talon’s device ID, however for this test, the device ID is irrelevant.
Typically, you can type “TalonSRX” and watch the intellisense auto pop up. If you press ENTER to select the entry, the IDE may auto insert the import line for you.
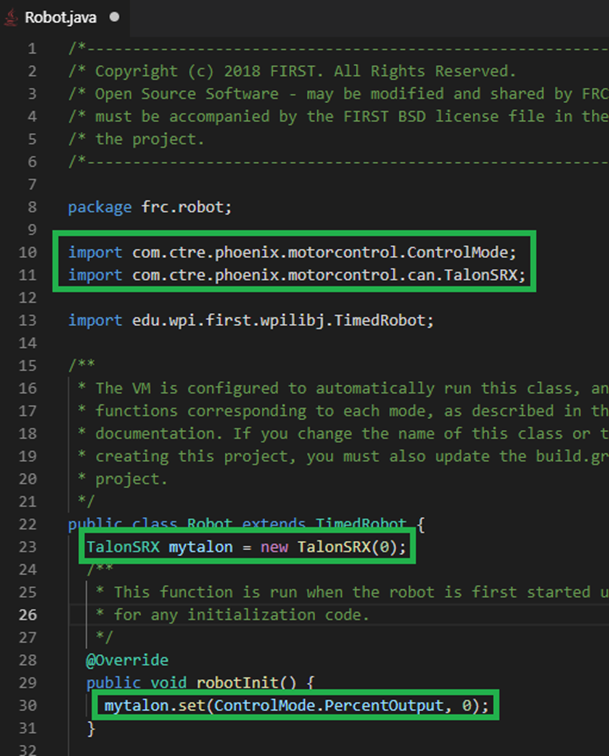
Add an example call, take your time to ensure to spell it correctly. Use the intellisense features if available.
Here is the final result.
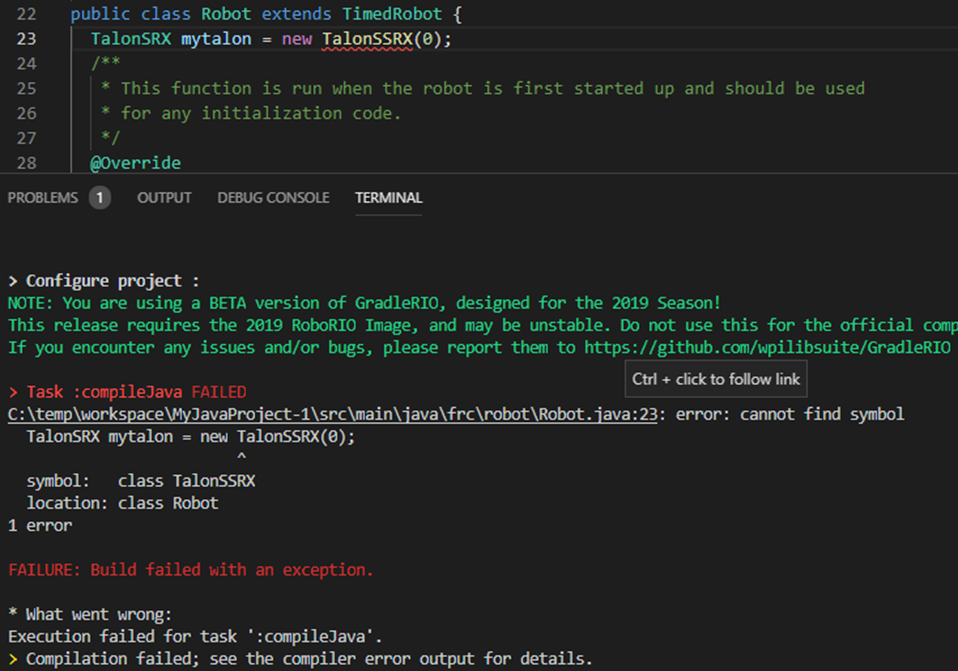
If you see build errors, carefully find the first erroneous line in the TERMINAL output. Typically, you can CNTRL + click the error line and auto-navigate to the source.
When resolving compiler errors, press the trash icon first to cleanly erase the previous error lines in the terminal. Or manually scroll the bottom to ensure you are not looking at stale error lines from previously failed builds.
The only reliable way to confirm build was successful is to confirm the BUILD SUCCESSFUL line at the bottom of the TERMINAL.
Note
The problems tab may or may not be clear of errors. Our testing with VSCode has shown that it can report stale or incorrect information while making code changes. Always use the TERMINAL output to determine the health of your compilation and build system.
FRC C++/Java - Updating Phoenix
If you already have a previous version of Phoenix installed and you want to update to a newer version, follow these steps. Install the latest version of Phoenix on your PC. Basically, rerun the latest installer (same as section above).
Open your robot program in VS Code.
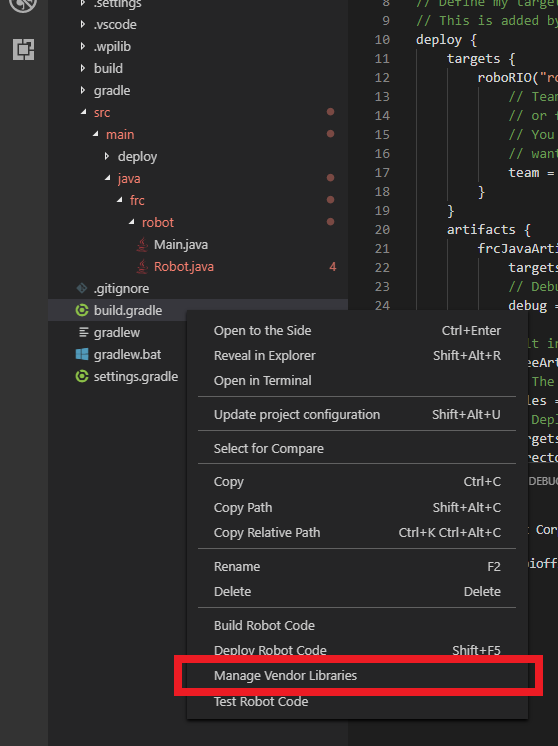
At the top of your screen, a menu will appear. Select “Check for updates (offline)”.
Tip
Alternatively you can use “Check for updates (online)”. However this is not recommended as this requires a live Internet connection to use your FRC project.

The menu will now display a list of vendor libraries you can update. Check “CTRE Phoenix”, then click “OK”

FRC C++/Java – Test Deploy
Create a Talon SRX (or Pigeon, CANifier, Victor SPX) and attempt to “deploy”. Adding a print statement also helps to confirm you are actually deploying the software displayed in VsCode. Confirm that the software deployed using DriverStation. DS may report firmware-too-old / not-retrieved errors since the hardware has not been setup yet.